Texture Animations
Today, we're going to learn how to make a game character that can be used to develop full-fledge, interactive games. A really nifty game character should have some basic functionality common to many games: ability to respond to collisions, ability to respond to user input, ability to run animations, etc. The assets for this game character are from kenney.nl, and the final character should look like this in your web browser:

This TextureAnimationInfo object will have a prototype with shadow properties that provide default values for the duration, imageExtension, and basePath properties. The object literal notation defines these properties as "own" properties as well, which means that we can override the prototype properties if we need to change the imageExtension or basePath for the texture images. The default duration is 1000 milliseconds. The texture images used to animate this character are stored in the directory "./img/characters/" and include the following texture images:
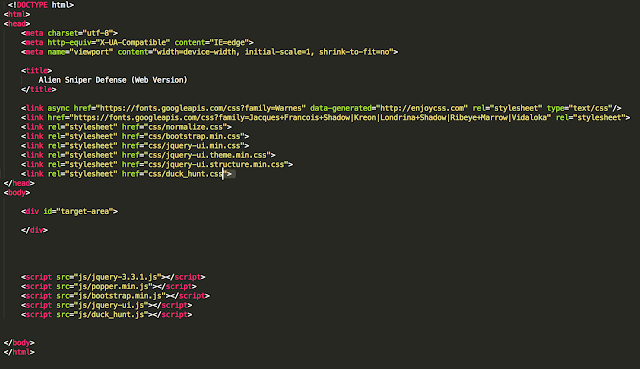
For today, we'll focus on enabling our game character to run animations. In a text editor, create a new html file and make sure to include the necessary <script> and <link> tags needed to include jQuery, jQuery UI, and Bootstrap. For the animated game character, you will only really need jQuery, but I like to include jQuery UI and Boostrap as a matter of habit.
Your custom css and javascript files are app.css and app.js, respectively, each of which should be located in dedicated folders (css/ and js/ directories respectively).
Your custom css and javascript files are app.css and app.js, respectively, each of which should be located in dedicated folders (css/ and js/ directories respectively).

I've titled the page "Animated Game Character." In the <body> tag, I've included a <div> element whose id will be set to "target-area." In your app.css file, configure the div#target-area element as follows:

In addition to the css specifications for the #target-area element, it's also necessary to configure the css attribute values for the .target-image class. This will be temporary, since we will later refactor the code so that the css attributes of the .target-image class are set dynamically. For now, though, we configure the css attributes for the .target-image class in our .css file in order to keep our character positioned in the target area, taking up the full width and height, as shown below:

Basically, this should take up the entire width of the screen and be tall enough to create a nice backdrop for our animated character. Use a linear gradient transitioning from lightblue at the very top to a darker shade of blue at the very bottom. This will create a nice sky backdrop for our animated character.
For your app.js file, write the following code, which defines a constant for the div#target-area element that will act as our tentative game scene and hold our game character:
$(document).ready(function(){
var TARGET_AREA = $("#target-area");
});
In my app.js file, I will start to define a Character object using object literal notation. This Character should have a few basic properties defined at the outset: container (which will be the reference to the <div> element that will contain our texture images), textureAnimationInfo (which will hold a reference to a configuration object that will hold the data needed to configure our texture animation), and textureAnimationTimerID (an integer that will store the ID for the timer that repeatedly executes the function for running the texture animation; this ID will be needed to stop the animation with the clearInterval() method).

Before we go further, let's define the TextureAnimationInfo object as shown below:

This TextureAnimationInfo object will have a prototype with shadow properties that provide default values for the duration, imageExtension, and basePath properties. The object literal notation defines these properties as "own" properties as well, which means that we can override the prototype properties if we need to change the imageExtension or basePath for the texture images. The default duration is 1000 milliseconds. The texture images used to animate this character are stored in the directory "./img/characters/" and include the following texture images:
 |
| wingMan1.png |
 |
| wingMan2.png |
 |
| wingMan3.png |
 |
| wingMan4.png |
 |
| wingMan5.png |
Going back to our app.js file, let's continue defining methods for our Character object:

The addCharacterToScene function will basically add the game character to the game scene. In order for this to work, we will have to pass in the scene or "target-area" as an argument to the function.


The addCharacterToScene function will basically add the game character to the game scene. In order for this to work, we will have to pass in the scene or "target-area" as an argument to the function.

The addTextureAnimation function basically stores a reference to the textureAnimationInfo configuration object, whose properties we defined above. It also creates an image element corresponding to each texture whose image path we provided in the textureAnimationInfo object. Each of these <img> elements are appended tot this.container.

The stopTextureAnimation function basically takes the reference to the timer ID that corresponds to our animation and passes it into the clearInterval function, which is a property of the window object.

The startTextureAnimation function is the most complicated of all the methods we've defined so far for the Character object. It defines a nested function, runAnimation, which returns the setInterval function, also a method belonging to the window object. The reason we define runAnimation as a nested function is that we need to capture references to the properties index, lastIndex, and currentTextures, which are defined in the scope of the startTextureAnimation function. We cannot use this in the setInterval function because setInterval is defined on the window object, which means this will refer to the window object and not the Character object whose properties we want to access, so we have to declare local references to the collection of image elements that are contained in the Character's container property and which provide the basis for the texture animation. The runAnimation function basically loops through all the textures, toggling the css visibility property on and off to give the impression that one texture is alternating with another.
In addition, for our Character object, we will define two convenience getters, one to get the index for the last texture contained in this.container and another to get the array of textures obtained by calling the .container() method on the this.container div element:

Finally, in our app.js file, below our definitions for the Character object and the TextureAnimationInfo object, we define a series of high-level functions that will create a TextureAnimationInfo instance (which holds references to all of our texture names) and an instance of our character (here named "wingman"). Furthermore, we add the character to the scene (i.e. TARGET_AREA, start the animation, and then stop the animation after a period of about 10 seconds:

You should get a flying wingman as shown below:
Congratulations! You now know how to create a game character with a simple, repeating texture animation using jQuery. You are well on your way to creating fantastic games with jQuery.
Congratulations! You now know how to create a game character with a simple, repeating texture animation using jQuery. You are well on your way to creating fantastic games with jQuery.

This comment has been removed by the author.
ReplyDelete