Javascript Getter and Setters; jQuery .data() function
For many kinds of games, a given character is likely to have a health level. After taking enough damage, the character's health level falls to zero, at which point the character can be seen to run some kind of death animation and it's game over. To track the health level of a given character, or to keep track of any other kind of character-relevant data for that matter (e.g. magic, experience, etc.), you can create arbitrary attributes to store data in the DOM element that represents a character. jQuery offers the short-hand .data() function, which can be called on any jQuery element and which can double as a getter and a setter, depending on how many arguments are passed into the function.

We'll see this in action by hammering out some simple code to simulate a character taking damage, either as result of being attacked by enemies or as a result of being hit by the player. Check out the movie below, which features the by-now famous wingman character provided courtesy of kenney.nl:
Each time the fire button is pressed, the character takes a hit and its health level decreases by 1 unit. Once the health level falls to zero, the scene turns red and the character is dead. You can press the reset button to restore the scene to its original appearance. (The wingman texture has several variations which allow for one to create a flying animation, which we did in a previous post).
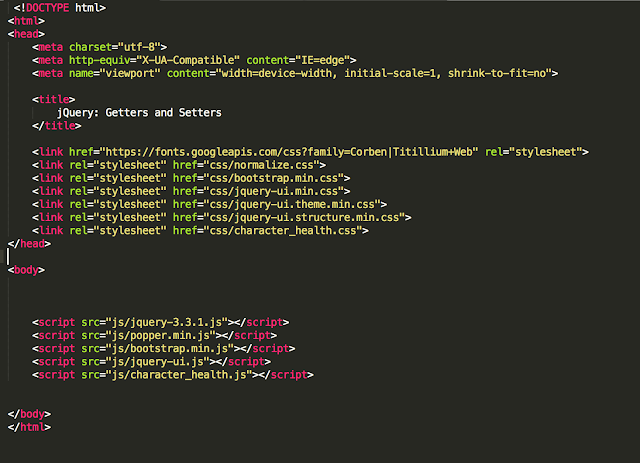
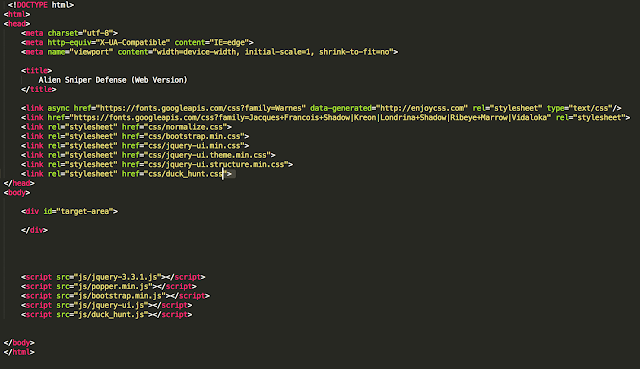
To begin, let's create a new html document (which we'll name character_health.html) with the boilerplate code (including all the necessary <link> and <script> tags) for importing Bootstrap, jQuery, and jQueryUI:

Notice that our custom .css file is named character_health.css, which we store in a dedicated ./css directory, and our custom .js file is named character_health.js, which we store in a dedicated ./js directory.
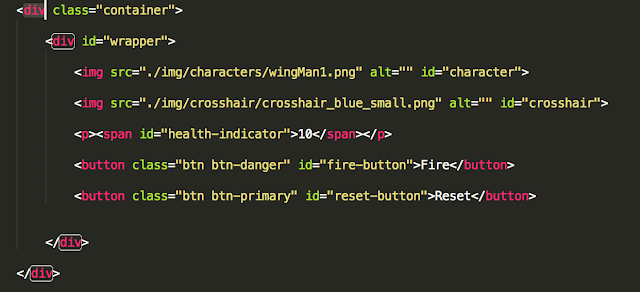
In the <body> tags of our html file, insert the following code:

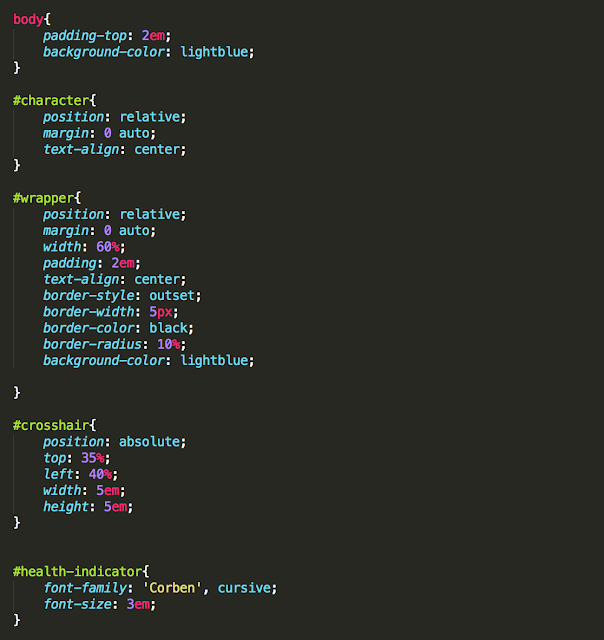
The <body> tag encompasses nested <div> elements, the outermost one having the .container class and the innermost one having the #wrapper id, attributes which we will reference later to provide some custom CSS styling. The innermost <div> element (with the id #wrapper) includes two <img> tags, one for the wingman character and another for the crosshair that represent the user's input device. In addition, the #wrapper <div> elements includes a paragraph enclosing a <span> element to serve as the display indicator for the character's health. Lastly, it also includes two buttons, one to simulate a firing action and another to reset the character to its initial state and original health level. With that out of the way, we will configure the CSS attributes for these elements in our character_health.css file, as show below:
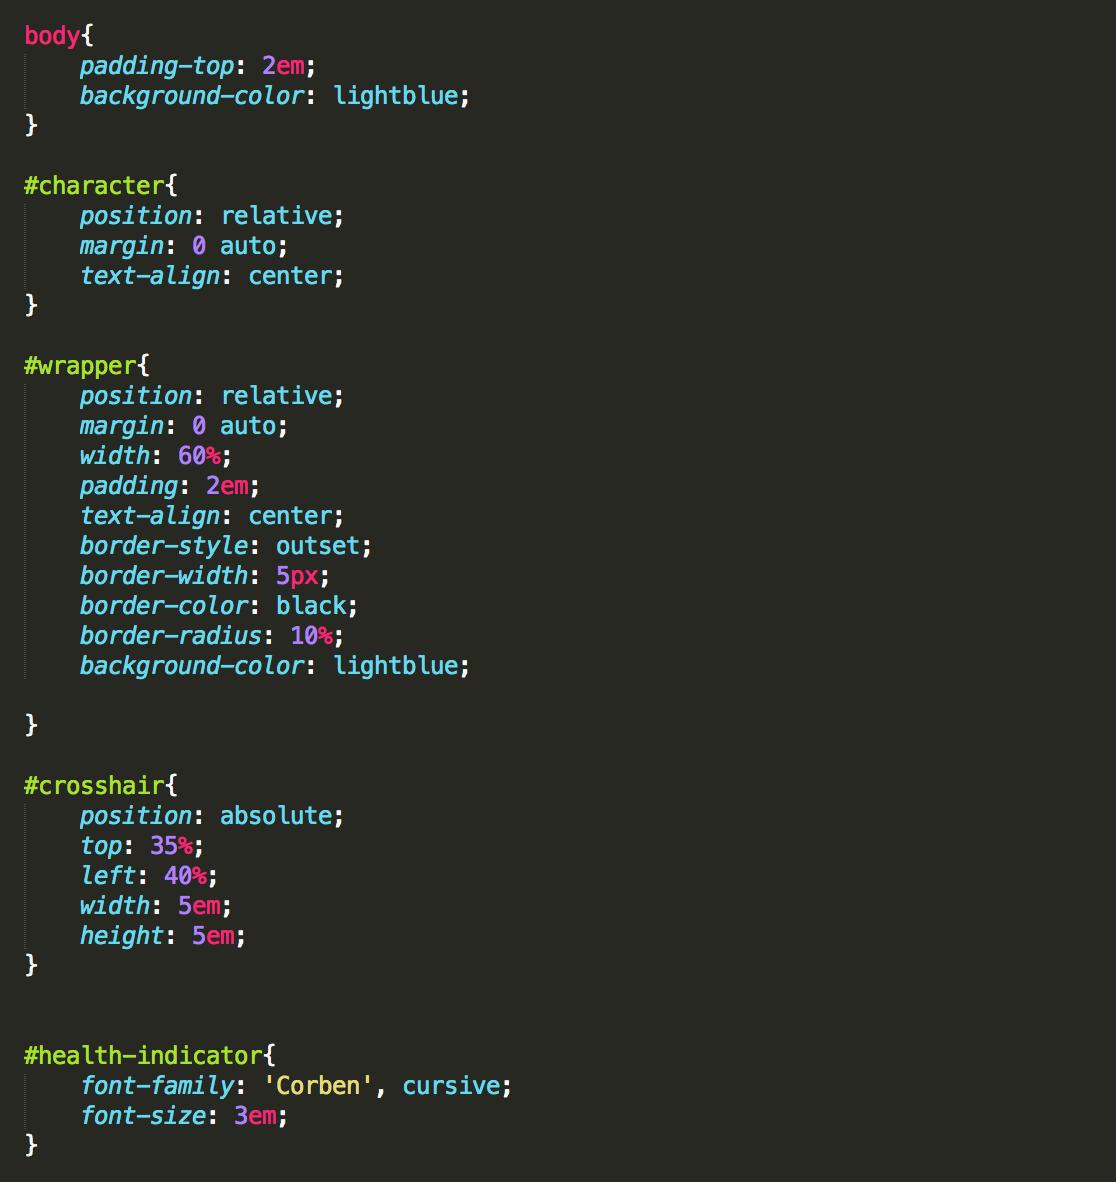
This styling is pretty straightforward. It gives a light-blue background to the page and basically centers the #wrapper element in the middle of the page with the character and crosshair inside of it. Both the character and crosshair use "absolute" positioning, which allows us to position both of them with respect to the top left corner of the #wrapper element. The crosshair should appear above the character since it is the element that comes after the character element in our document flow.
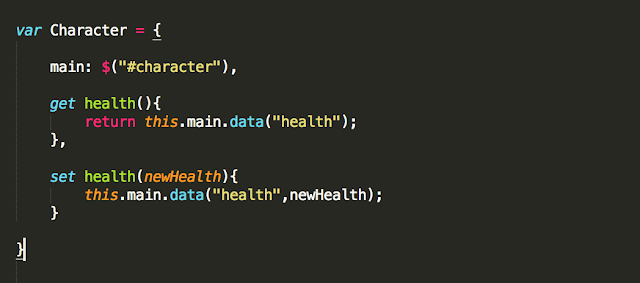
With the styling taken care of, we can now proceed to develop the code in our character_health.js file. As usual, all code should be inserted in the $(document).ready(function(){}) function. To begin wtih, we will use object literal notation to define a Character class. This Character will have a main property, which will reference the #character <img> tag in our HTML file and serve as the node for storing character properties such as health. However, we will not explicitly define a health property per se. Rather, we will define a getter and setter, each of which will call the jQuery $.data() function on the main property to retrieve and store character health data, respectively, as shown below:

The $.health() function stores arbitrary data in the <img> element used to create our character. In the case of the getter function, we pass in the key (i.e. "health") required to retrieve the corresponding value, which is the character's health level. In the case of the setter, we pass in the "health" key for the first argument and newHealth parameter provided by the user for the second argument This is very convenient, since each time we want to retrieve the character's health, we don't have to be concerned with how the data retrieval is implemented. The character health data could just as easily be stored in window.localStorage or some DOM element besides the <img> element representing the character. Each time we retrieve the health in code, we simply write this.health instead of the more verbose this.main.data("health"), and each time we want to set the value of the health property, we can write this.health = 10, instead of the more verbose this.main.data("health",10). Let's continue working on our codebase:

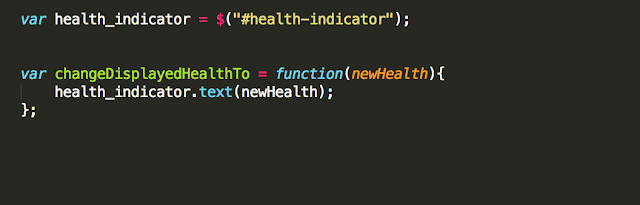
Above our definition for the Character class, go ahead and define a variable named health_indicator, which will store a reference to the #health-indicator <span> element, which will be used to display the character's health value. In addition, define a function, changeDisplayedHealthTo, which will set the text for the <span> element responsible for displaying the character's health. Both the health_indicator variable and the changeDisplayedHealthTo function should be available within the global scope of the entire codebase.
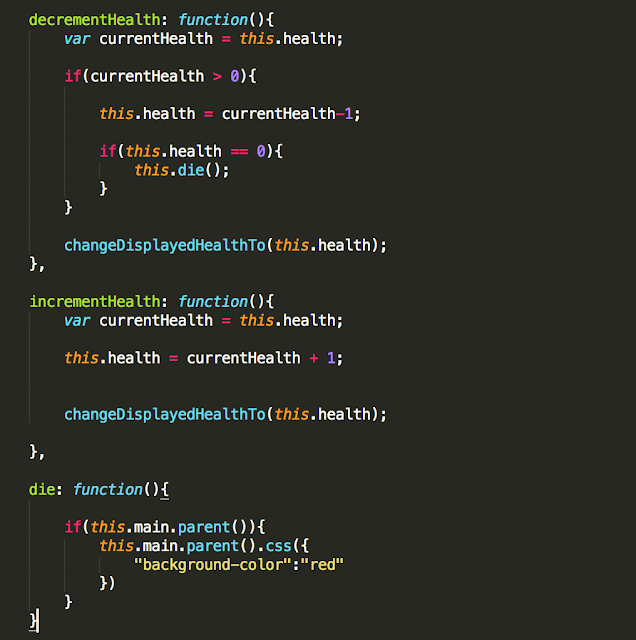
Let's continue developing our Character class below:
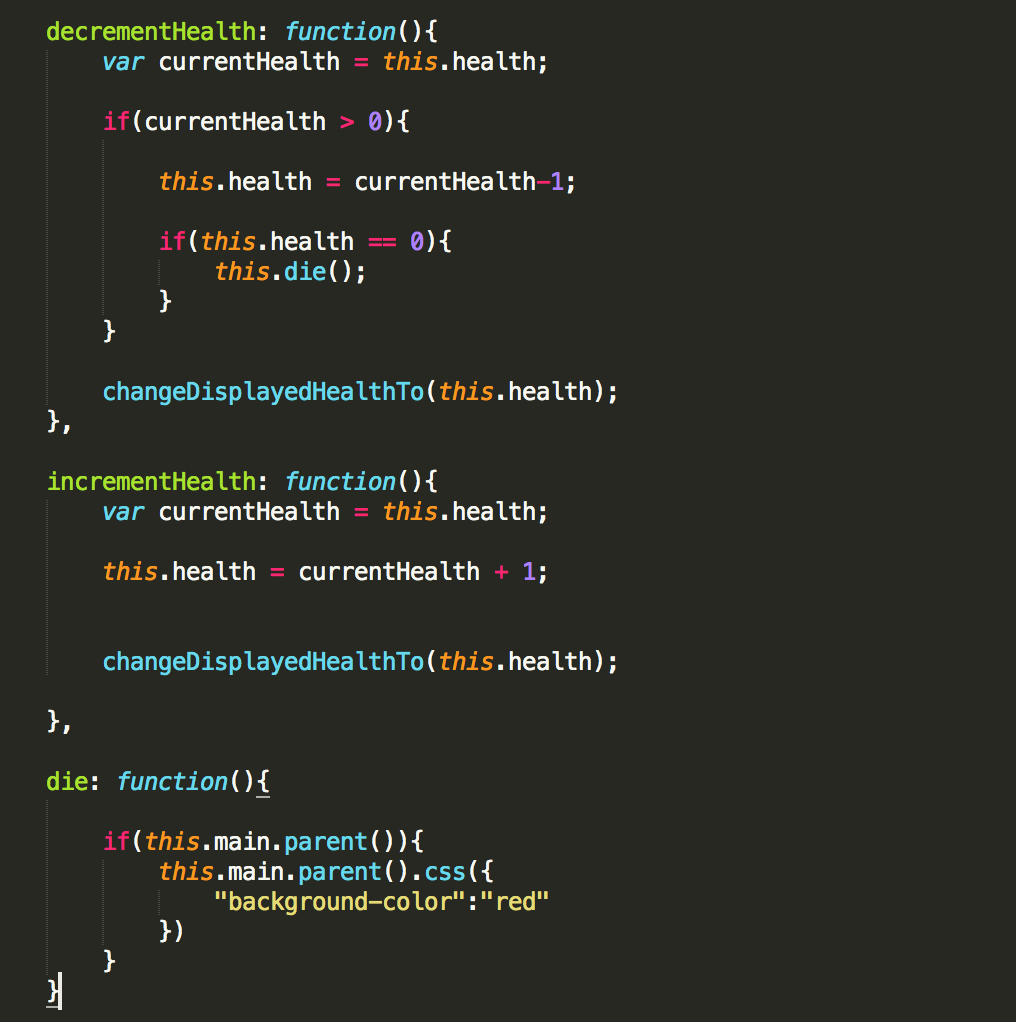
As you can see above, we've defined two complementary functions, decrementHealth and incrementHealth, which adjust the stored value of the character's health property (whose setter and getter we've already defined above) and which update the text displayed in the health-indicator (that is, our #health-indicator <span> element). In addition, in our decrementHealth function, we also call the die function when the character's health reaches zero. The die function simply changes the background-color of the #wrapper <div> element to red, but you could create your own unique effects as you see fit. Let's finish our Character class by defining a few more function, as shown below:

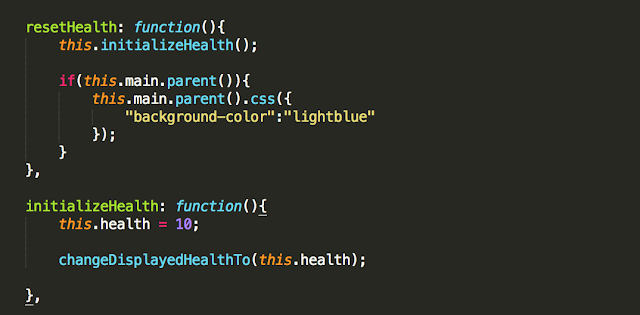
The initializeHealth function simply restores the character to its original health and updates the HUD (i.e. the <span> #health-indicator), and the resetHealth function simply calls the initializeHealth function while also restoring the original color of the character's #wrapper <div> element. Let's finish our codebase by writing out the following code below our Character class, as show below:
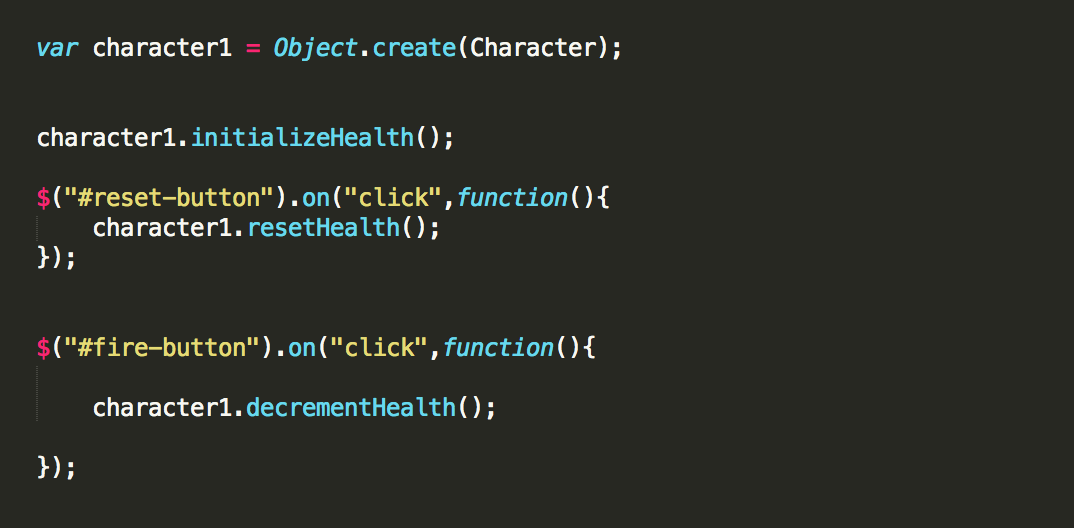
Basically, we instantiate a Character instance (i.e. named character1) via the Object.create() method, after which we initialize it's health value by calling the initializeHealth method on it. After that, we define two event handlers using the jQuery $.on() function, one for the #reset-button and the other for the #fire-button. These event handlers act as callbacks for the "click" event. In the case of #fire-button, we call decrementHealth on the character1 instance, so that the character's health decreases each time the fire button is pressed, and in the case of the #reset-button, we call resetHealth on the character1 instance to restore the character and the HUD (i.e. health-indicator) to their original states.
That should be enough for the effect to work. Open the character_health.html file in your browser and you should be able to see the effect below:
Congratulation! You've learned how to store arbitrary data in DOM elements using the jQuery $.data() function. In addition, you've learned how to define convenience getters and setters for a character's property. You can store other kinds of arbitrary data (such as magic, experience, etc.) for your own custom characters. Thanks, and please leave feedback below.
Comments
Post a Comment